Warning: May Contain Ranting...
When I learned to knit back in June, the course instructor said one of the hardest things was finding kits and projects that were easy enough for a true beginner.
This bag is made from a Learn to Knit with Rowan kit that I picked up in a sale a while ago. There is not a chance I could have knitted this as my first project or even my 20th. Let me explain...
The kit itself is lovely. It contains two balls of gorgeous Rowan Big Wool (this shade is called smooch - how cute!), plastic 10 mm knitting needles and the pattern leaflet. You can choose to make either this bag or a scarf and both look nice. As you can guess, I opted for the bag.
The leaflet contains short, basic guides on casting on, knit stitch, purl and casting off. The second row of the bag pattern requires you to do an increase on a purl row using make one and purling through the back of the loop!!! In my humble opinion, this is not a beginner stitch and, to add insult injury, it is not illustrated in the instructions.
In fairness, if you can manage the pearl increase, the whole thing is not too bad and knits up quickly. You make two sides, a flap, a gusset and a strap in a mixture of garter stitch and stocking stitch.
Now for the making up. The leaflet contains a series of paragraphs on blocking and various seam types, but these are really general. The actual making up instructions for the bag are completely vague and don't tell you what stitches to use at all. I used a combination of mattress stitch and whatever-would-make-it-hold-together stitch.
The kit did contain one excellent tip. It suggested sewing petersham ribbon on the inside of the strap to prevent stretching. Once I'd been on the internet to find out what petersham ribbon was (again a little explanation would have gone a long way), I sewed on some robust but sweet cupcake ribbon I had in stash and it worked a treat. In the absence of any instruction, I handsewed the ribbon on with ordinary sewing thread in small stitches on the surface of the wool.
The kit didn't make any suggestions about how to keep one's bag closed, so I sewed a large press stud to the underside of flap and then covered it over on top with a fabulous Czech glass button from The Bead Store.
Happily, there was some leftover wool and I fashioned a small matching purse using rib stitch with a stocking stitch flap. This is topped with a beautiful handmade glass button from Lush Lampwork.
Don't get me wrong, I think the finished bag is lovely but there is no way I could have made this until recently and that's after 6 months of fairly intensive knitting practise. Maybe I'm just slow...
Melx
With a little (more) help from ma...
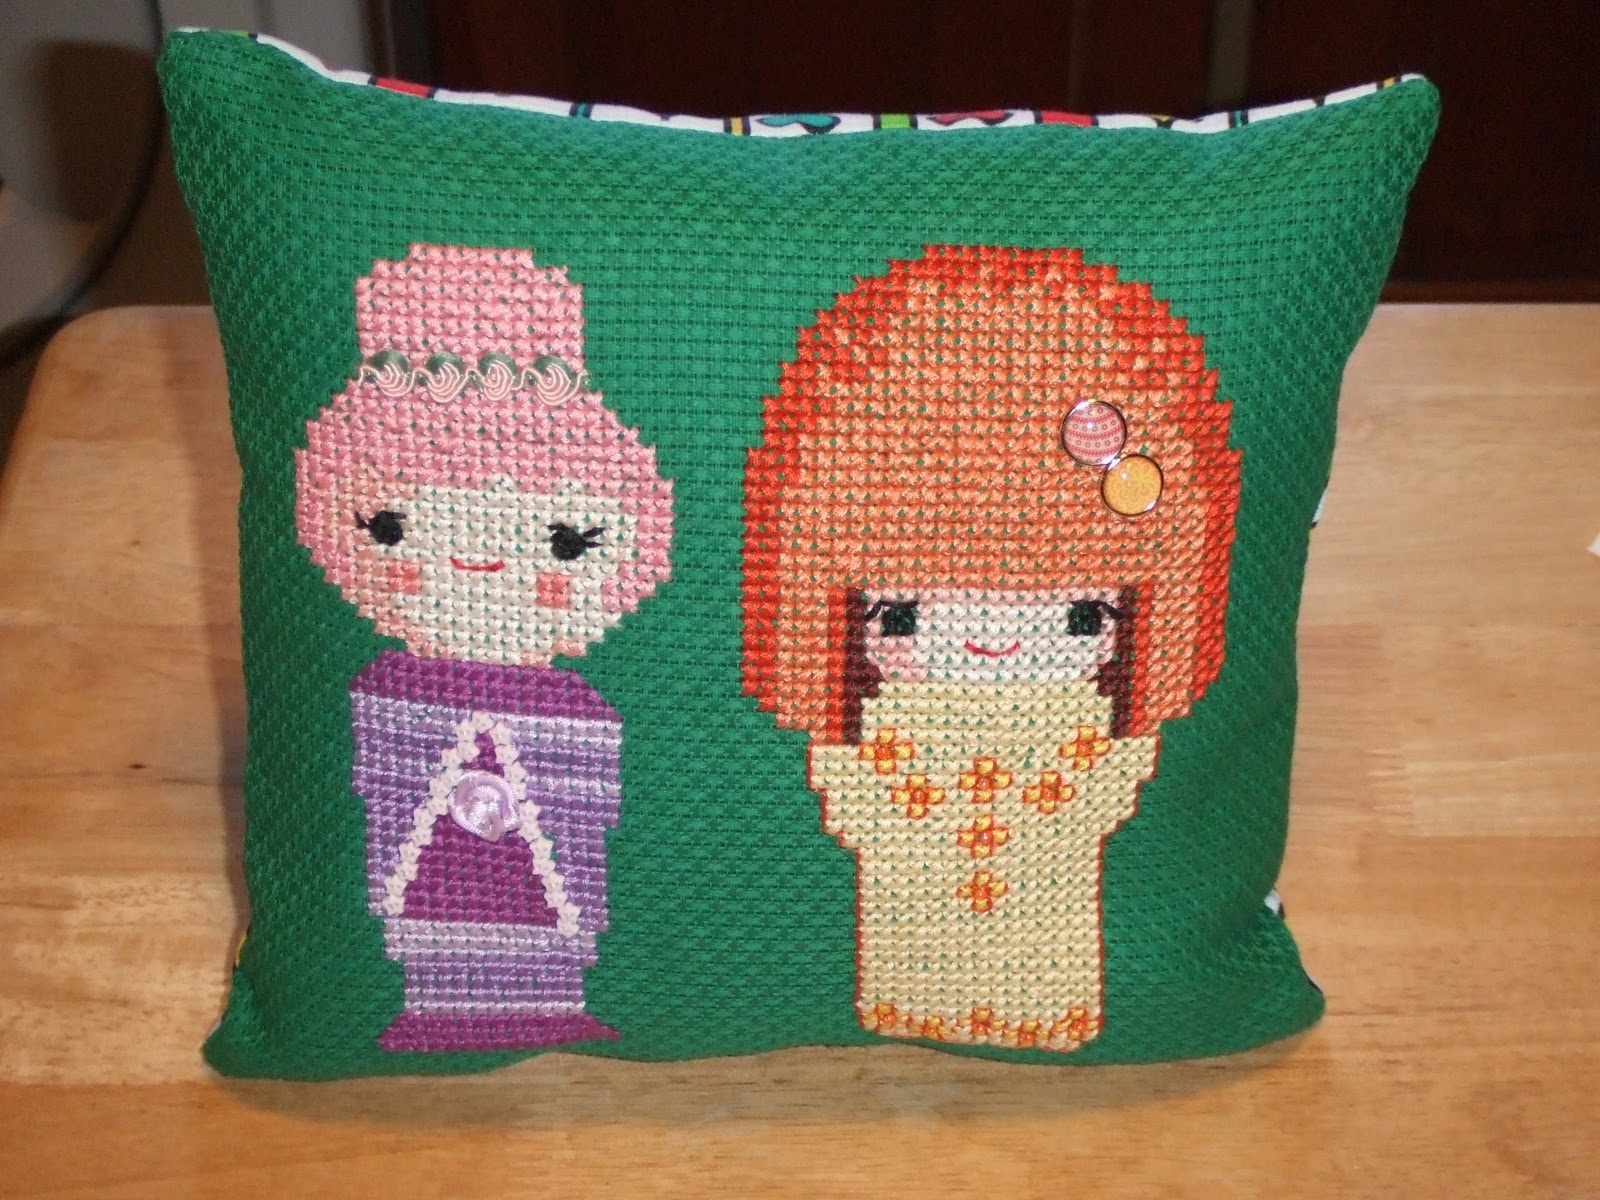
Well, my mum's been busy helping me with my crafting again. This is a new, larger version of the fab Momiji Dolls pattern from August's 2009's Cross Stitcher Magazine.
After making the panel for my knitted and felted bag, ma decided to try the dolls on a large scale piece of aida in new colours. I ended up with two dolls rather than three becuse they were so huge, but they do look fab. Mum decorated the purple and pink doll with rose ribbon braid. My only contribution was to put two glass brads into the hair of the orange and yellow dolly.
Having already made a bag, I decided the dolls would look cute as a small deco cushion (the finished size is about 8" square). I cut the aida into a square and then machine sewed it onto a piece of plain green cotton fabric so you wouldn't be able to see through the aida.
For the back of the cushion, I decided to use this fabulous Paula Ozier fabric that I had bought a while ago.
As the cushion won't really be washable, I simply machine sewed round the front and back, right sides together, leaving a gap in the bottom for turning. I always leave a miniscule gap for turning as I hate handsewing the gap closed. Having fought to get it the right way round, I stuffed the cushion with toy filling and did my tiny bit of hand stitching.
I think this is such a cute decoration, but I can't really take much credit...
Merry Christmas
Melx
 |
| Do you think I'm odd? |
Slightly weird bear...
This is the second kit I purchased at the Harrogate Knitting and Stitch Show on November 28th. Having already completed Momma Mouse, I only have one more kit to do (a cushion) to have got through them all within a month of purchase. Yay me!
Anyway, this is a Mr Been (the manufacturer's spelling not mine) alpaca teddy bear kit from Alpaca Select costing £11.
Teddy is knitted with 3.75mm straight needles and all in bits - head, two body pieces, two legs and two arms. The pink alpaca yarn that was supplied with the kit was just lovely to knit with and a really pretty colour.
Because of all the separate pieces, the making up was a bit of a chore. My mattress stitch is improving a bit and I am reasonably happy with the body and limbs. However, I don't think I made the best job of sewing the head together to meet in the middle.
For the facial features, I used some safety eyes and then black tapestry wool for the nose. I used polyster toy stuffing for the filling. I found a pink sparkly ribbon for teddy's neck, which helpfully disguises the rather dodgy sewing of the head onto the body.
I am concerned that teddy looks a bit odd. My husband assures me that it looks the same as the ones in the picture on the kit, which I suppose might mean the oddness isn't entirely my fault?
Very nice yarn though....
Melx
Attack of the Giant Mouse
I saw this supercute mouse when I visited the Harrogate Knitting and Stitch Show on November 28th. It was a kit from The Button Company costing £19.
I have to say that I am very proud of myself for actually getting on and doing the kit so quickly. I often buy things at shows that then languish unmade for many months or even years. I am especially proud because I was a bit intimidated by the kit because: (1) mousey is rather large at 14" high, and (2) mousey is fairly three dimensional compared with the flatter softies I often made.
The kit comprised the pattern, the brown fleece and the knitted flower fabric, together with the safety eyes and nose and the pom pom ribbon for the neck. I supplied the toy stuffing, thread and interfacing for the front of the ears.
Most of the mouse was machine sewn, which was moderately straightforward given the fairly large pieces. The pattern didn't specify a seam allowance so I veered between a quarter and half an inch, trimming the seams for rounded parts.
My main cheat was the ears. In the pattern, the knitted flower fabric is only used for an inner ear piece. I couldn't for the life of me figure out what the pattern was saying about how to make the front of the ear, so I decided just to make the whole front of the ear from knitted fabric and the back from fleece. I think the ears look perfectly good that way.
I assembed the head of the mouse and then the body ready for stuffing, sandwiching in the paws, ears and tail in the right places. I put quite a lot of plastic toy pellets into the base of the mouse to help it stand up easily. I filled the rest of the base and the head with polyster toy stuffing.
To complete the mouse, I hand-sewed the head to the body, which was probably the trickiest bit of the whole project. Finally, I covered my line of stitches with the pom pom neck ribbon.
I found mousey easier to do than I expected and I am quite impressed with the result. I just need to find somewhere to put her now...
Melx